Headless mode of Raspberry Pi
February 17, 2017
This post explains how to configure Raspberry Pi for headless mode (with no monitor and keyboard/mouse of its own).
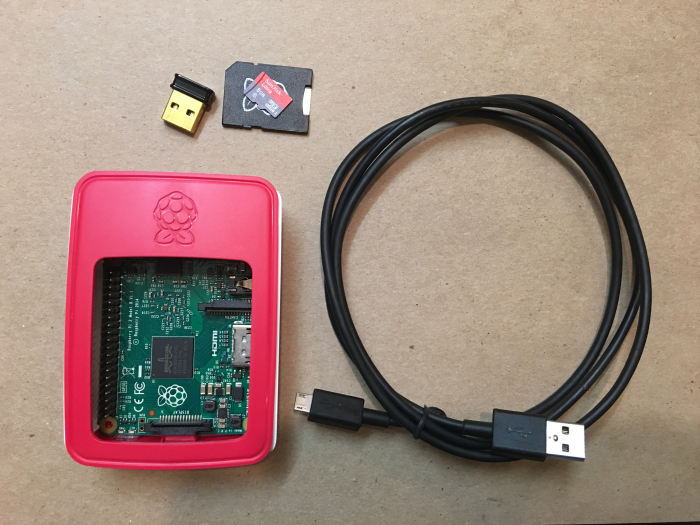
Things we need
- Raspberry Pi
- SD / microSD card (4GB+)
- USB WiFi adapter (Not required for Raspberry Pi 3 which has WiFi inbuilt)
- USB power cable
- A computer with Linux, macOS or Windows (for burning OS image to SD / microSD and remote connection)
- Internet connection
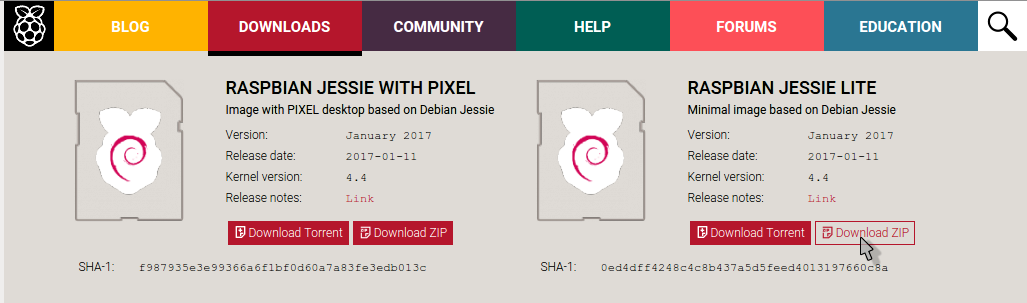
Download OS image for Raspberry Pi
Raspbian is the Foundation’s official supported operating system which comes in 2 flavours:
RASPBIAN JESSIE WITH PIXEL- Full image which includes a new desktop environment called PIXEL (Pi Improved Xwindows Environment Lightweight) and many pre-installed applications.RASPBIAN JESSIE LITE- Minimal image which doesn’t include desktop environment and includes core packages. Ideal for headless mode
Let’s use minimal version RASPBIAN JESSIE LITE.
Download and extract it.
Install Raspbian image on SD / microSD
(I am doing this on my Ubuntu laptop. Check this url for other OS/methods)
Insert SD/microSD into computer using USB Card reader or SD card slot and burn Raspbian Lite image using ImageWriter.
sudo apt-get install usb-imagewriter # install ImageWriter if you don't have it
sudo imagewriter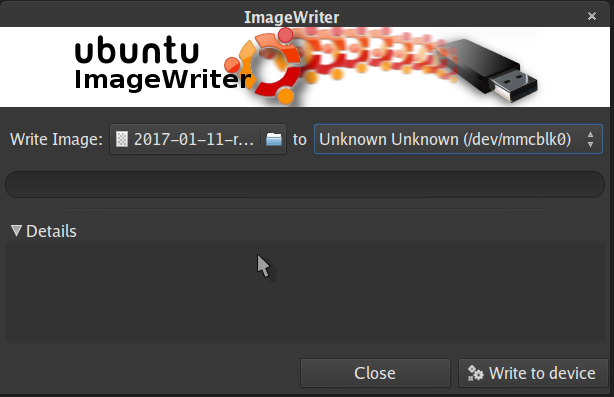
After successful completion Raspbian should be ready to use.
Enable SSH in newly installed Raspbian
SSH is disabled by default in Raspbian. To enable it create an empty file with name “ssh” in boot partition
% cd /path/to/sd/card/boot # note that we have to create it in boot
% cat /dev/null > ssh  # blank file
Configure WiFi connection
Edit wpa_supplicant.conf configuration file from sd card using root access
% cd /path/to/sd/card/
% sudo vim etc/wpa_supplicant/wpa_supplicant.conf # use sudo
And put your wifi credentials in below format at the end
network={
    ssid="your_wifi_ssid"
    psk="your_wifi_password"
}
Save file and exit.
Access Raspberry Pi remotely over WiFi (using SSH)
We’ve already enabled SSH and WiFi on Raspbian so that we can access it remotely from computer. Insert SD/microSD card in Raspberry Pi. Make sure WiFi adapter is plugged in (not required for Raspberry Pi 3) and plug the power cable. While booting up, it’ll connect to your local network over WiFi with given credentials in previous step.
In order to connect to your Raspberry Pi using SSH we need to know the Pi’s IP address.
Thanks to Avahi auto service discovery implementation which is installed by default on debian and ubuntu systems, we can use raspberrypi.local to address our Raspberry Pi (without worrying about it’s IP which can be changed by DHCP every time we will reboot/reconnect)
Default login credentials for Raspbian are:
username: pi
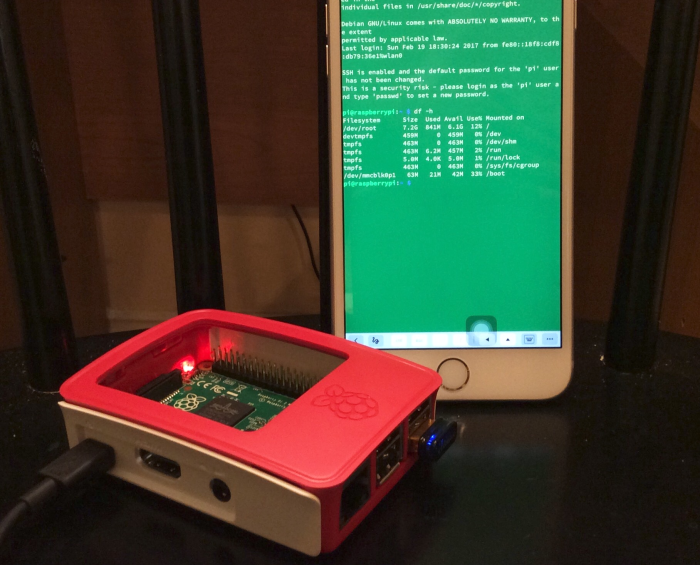
password: raspberryOpen terminal (use PuTTY on Windows) and ssh using user pi
ssh pi@raspberrypi.localAfter entering password succesfully it will land you in Raspberry Pi. Let’s update it.
sudo apt-get update && sudo apt-get upgradeThat’s it. You can now access your RPi with any device having a utility to SSH. Here’s my RPi with phone as head.
Next section describes some more interesting things you can to do with your RPi. Have a hapPi journey! :)
Further reading:
- In case you are not able ssh using
raspberrypi.local, find Pi’s IP address and use it instead. Check here. - Use raspi-config - Raspberry Pi configuration tool in Raspbian that allows you to easily enable features such as the camera, and change your specific settings such as keyboard layout.
- Setup Watchdog which automatically restarts RPi if it becomes unresponsive - helpful to make your projects more reliable.
- Install Fail2ban which bans IPs that show the malicious signs of incorrect authentications attempts.
- Although Raspbian Lite doesn’t include GUI by default, we can easily install one and access Raspbian via GUI. Follow this guide - Raspbian Lite with PIXEL/LXDE/XFCE/MATE/Openbox GUI
- Access Raspberry Pi over VNC